
Fall Colors in the Eastern Sierra
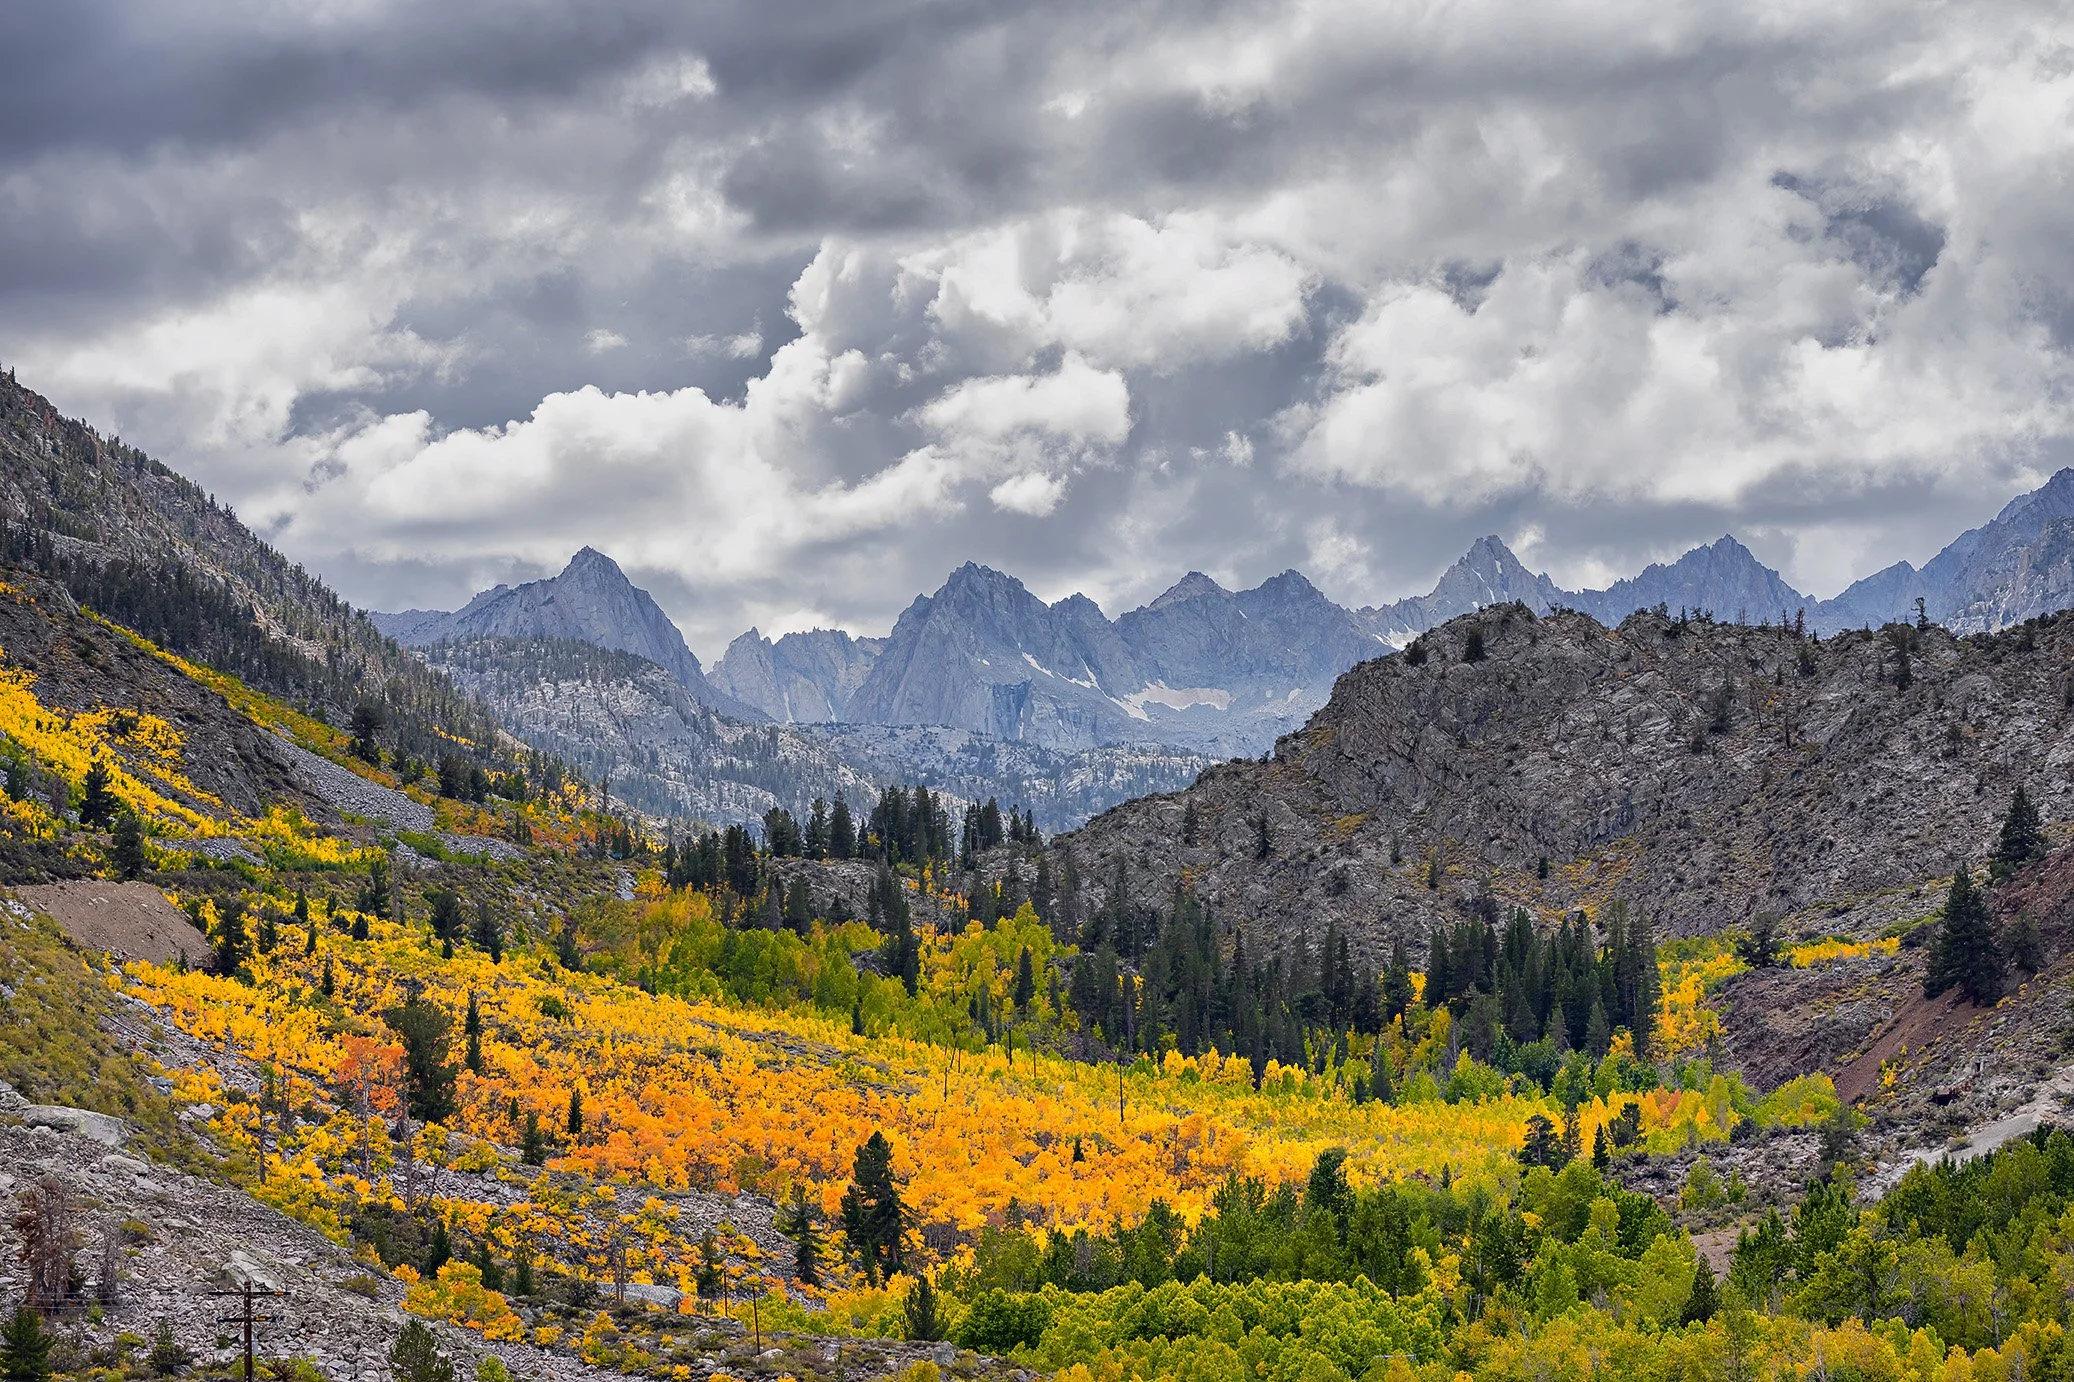
Photo: Aspendell
Exposure: ISO 100, F/11, 1/80sec
There’s a certain magic that happens when light, landscape, and timing all come together. But none of it matters if you’re not there to witness it. That’s the heart of the old photojournalist’s mantra: “F/8 and Be There.” It means be ready—technically and physically—to capture the moment. Nowhere does this philosophy ring truer than in the Eastern Sierra during fall.
Why Go?
The Eastern Sierra in autumn is a visual symphony. Think jagged granite peaks backed by dramatic skies, and groves of aspen igniting the valleys with fire-orange, golden yellow, and lime green. It’s nature’s last big show before winter cloaks the region in snow.
Few places in California offer such a potent combination of alpine drama and autumn color, especially in early to mid-October. The Eastern Sierra also tends to be less crowded than other fall-foliage hotspots like New England or the Smokies—offering solitude, crisp air, and intimate moments with the landscape.
When to Shoot
Timing is everything in fall photography.
Golden Hour: Mornings are best for soft light, cool tones, and low sun that brings out the texture in the leaves and mountains.
Overcast Days: Don’t be discouraged by clouds. As seen in the image above, moody skies make the colors pop even more and add emotion to your landscapes.
Peak Color: The sweet spot is usually late September to mid-October, depending on elevation. The higher the grove, the earlier it turns. The images in this blog were shot on September 27th. Elevations where peak color was seen was 8000 – 9000 feet.
Gear Notes
You don’t need an arsenal of lenses to capture great images—just the right mindset and a little planning.
Camera: Any DSLR or mirrorless camera will do. Even a high-end phone can work if you’re thoughtful with composition.
Lens: I would recommend taking 3 lenses. A 16-35mm wide angle to capture wide vistas or is useful in tight spaces e.g., along a stream and capture the foliage. A 24–70mm is perfect for landscapes and tighter compositions. Add a 70–200mm or 100-400mm, if you want to compress the background or isolate details.
Tripod: Essential for low light, especially around sunrise or sunset.
Filters: A polarizer can reduce glare and enhance leaf color. Consider an ND filter for silky water shots at creeks or waterfalls.
Pro Tip
Don’t just shoot wide vistas. Get close. The second photo below - an intimate look at quaking aspen leaves—was taken with a shallow depth of field to isolate color and texture. Look for contrast in light and hue, and use layers to guide the eye.
And if you're chasing the perfect shot? Scout first with your phone. Snap a few frames, check the light, then bring out your camera for the refined version.
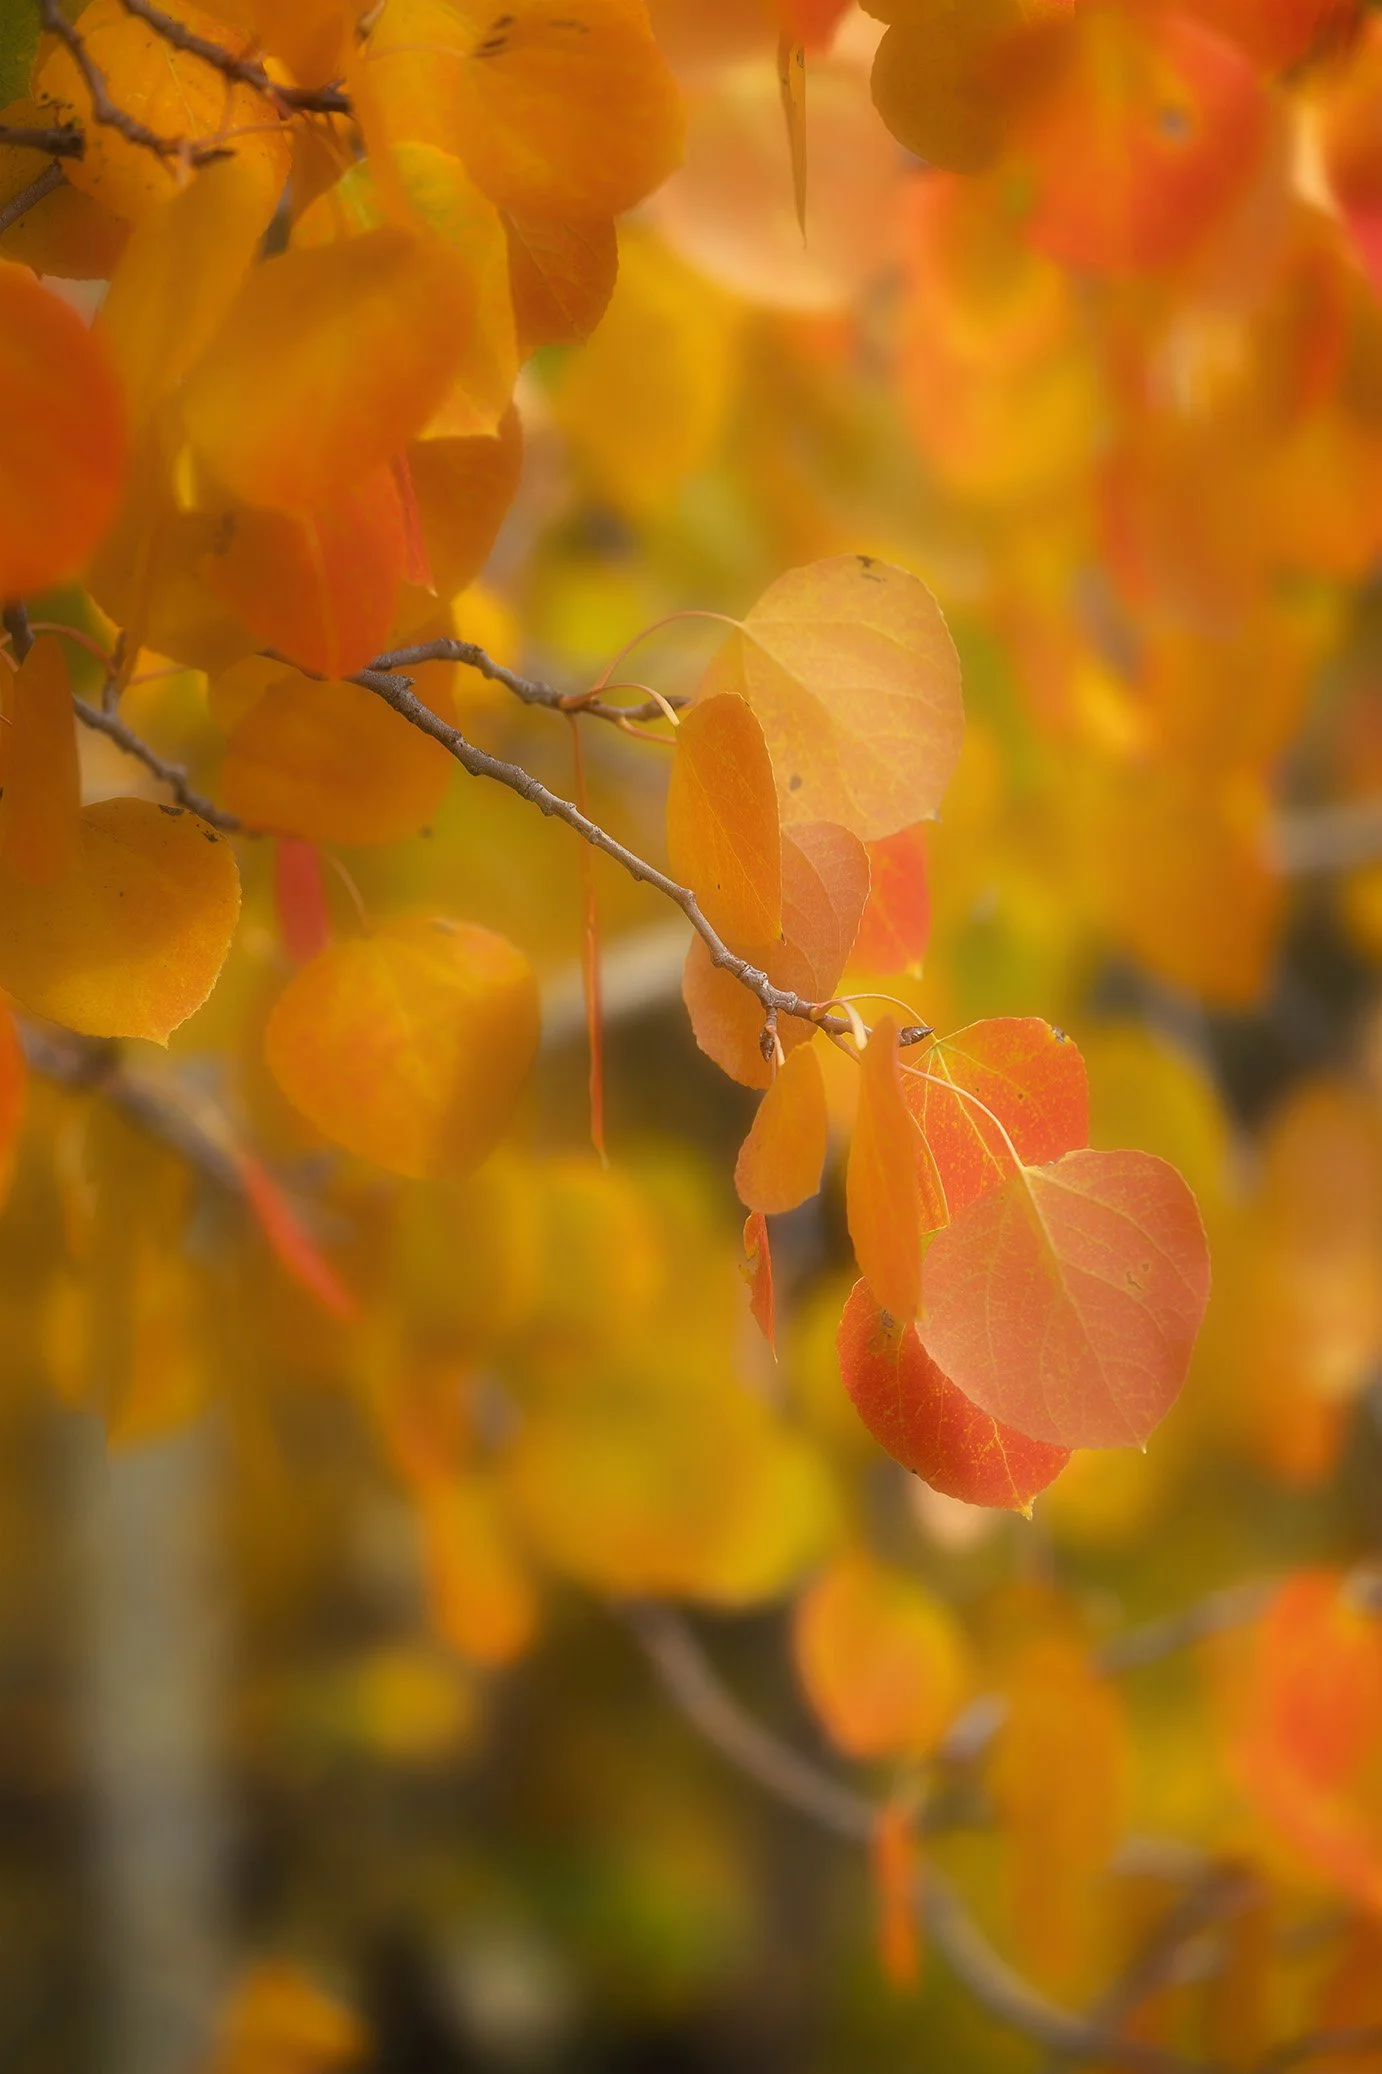
Photo: Aspen
Exposure: ISO 100, F/5.6, 1/250sec
Getting There
The Eastern Sierra stretches along Highway 395, from Lone Pine to Bridgeport. Some of the best fall color spots include:
Bishop Creek Canyon (South Lake, North Lake, and Sabrina Lake)
June Lake Loop
Convict Lake
Rock Creek Lake
McGee Creek
Most of these areas are easily accessible by car, with short hikes leading to more secluded spots. Start in Bishop if you want a good base, and plan day trips from there. Cell service can be spotty, so download offline maps and check weather before heading into higher elevations.
Final Word
In a world full of excuses and distractions, just showing up can be your biggest win. Pack your gear, hit the road, and remember: F/8 and Be There.
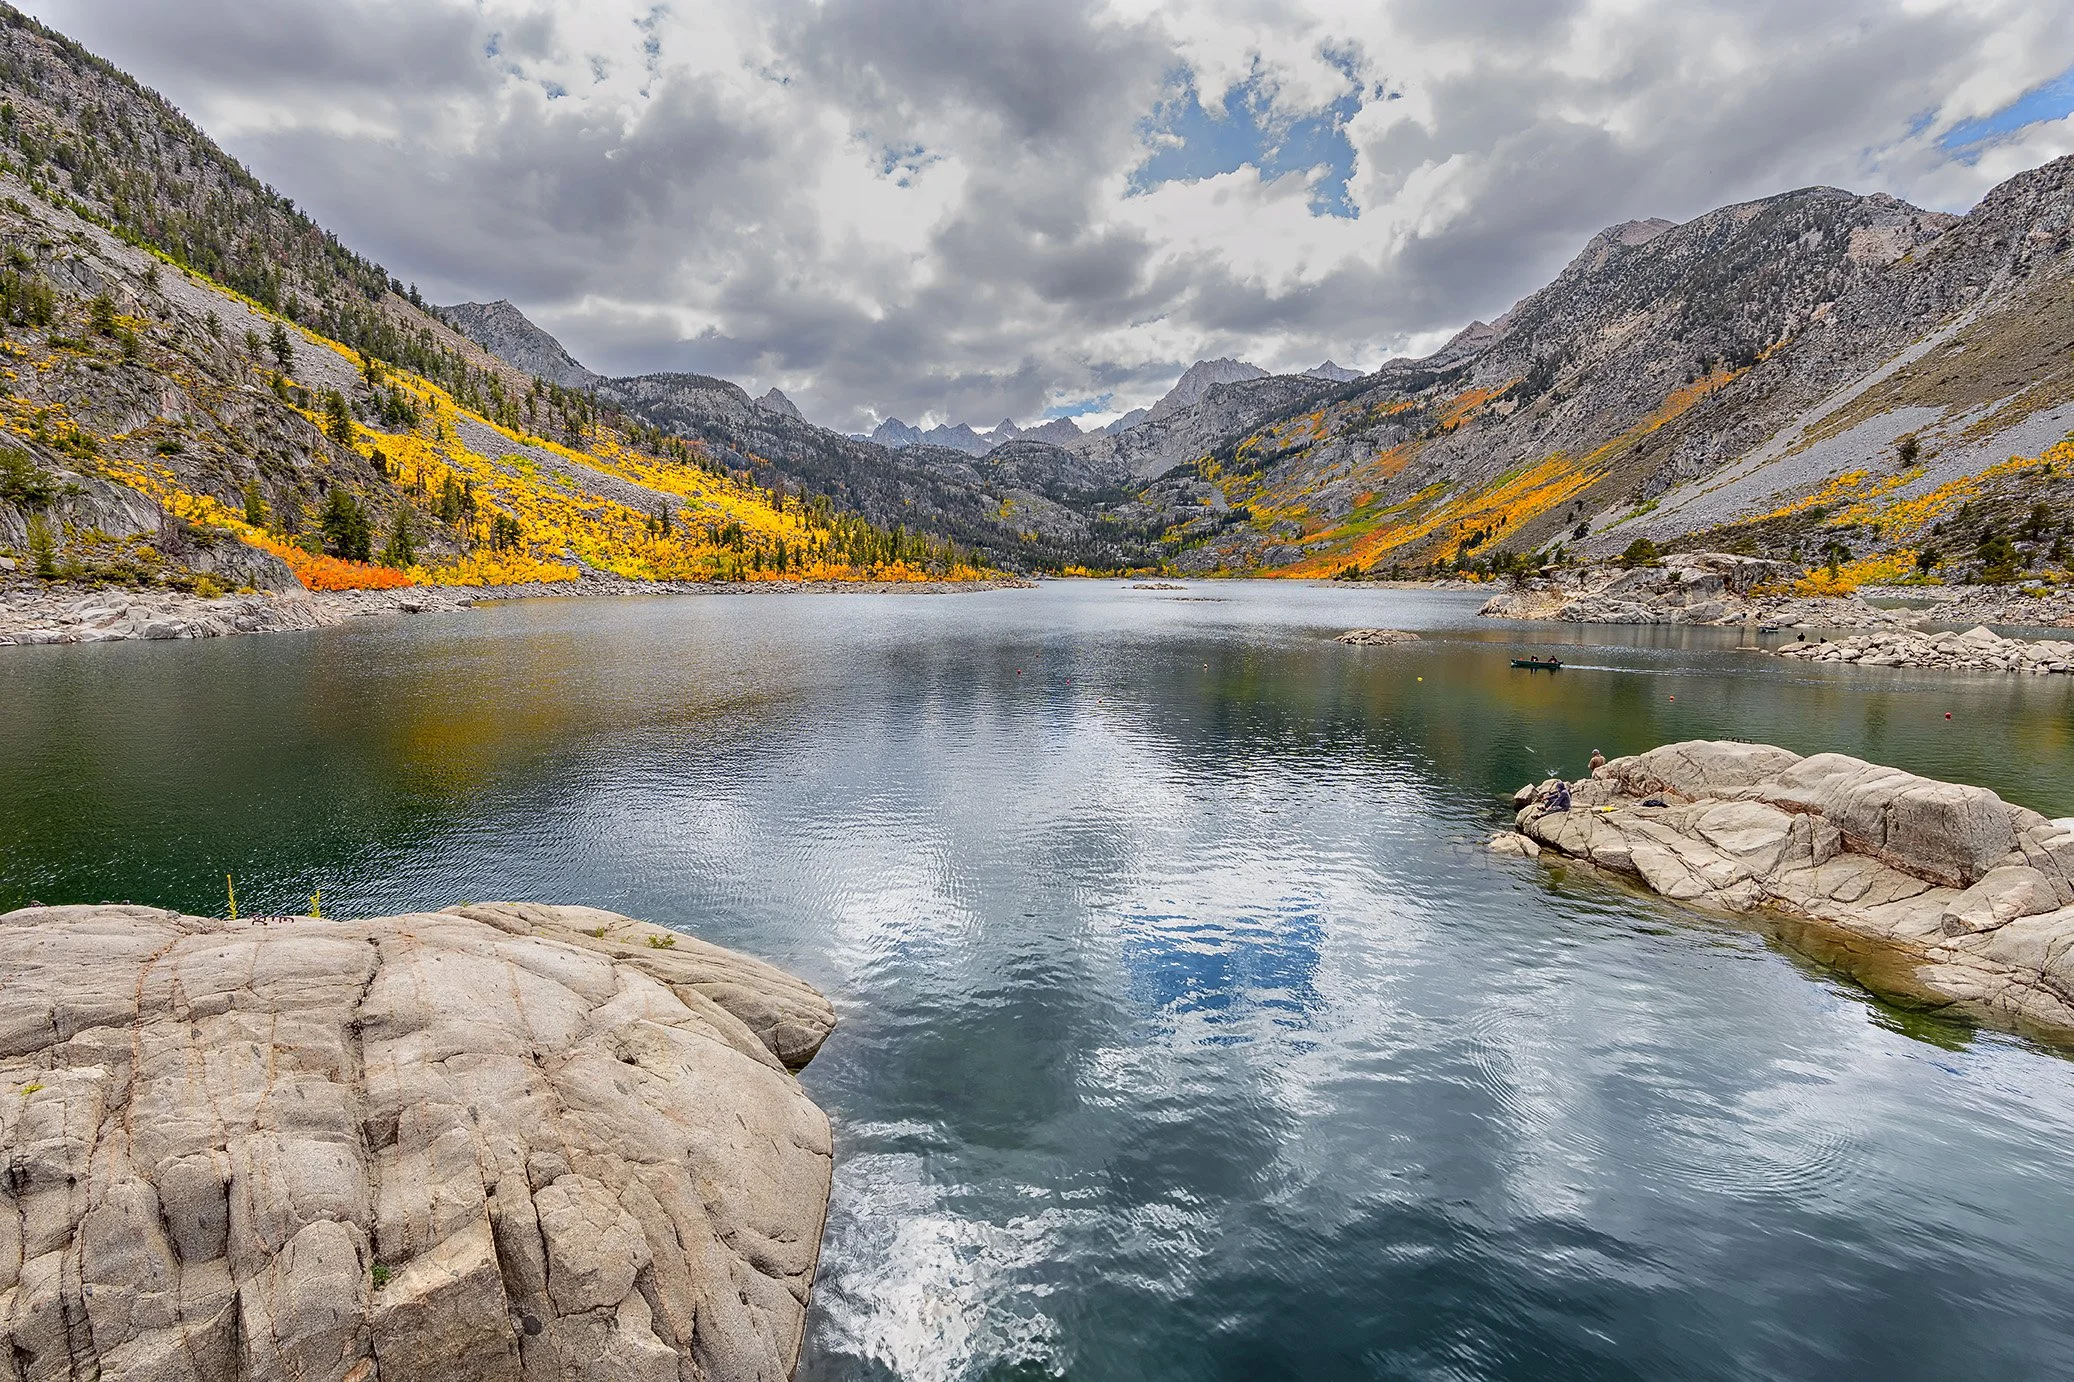
Photo: Lake Sabrina
Exposure: ISO 100, F/8, 1/125sec